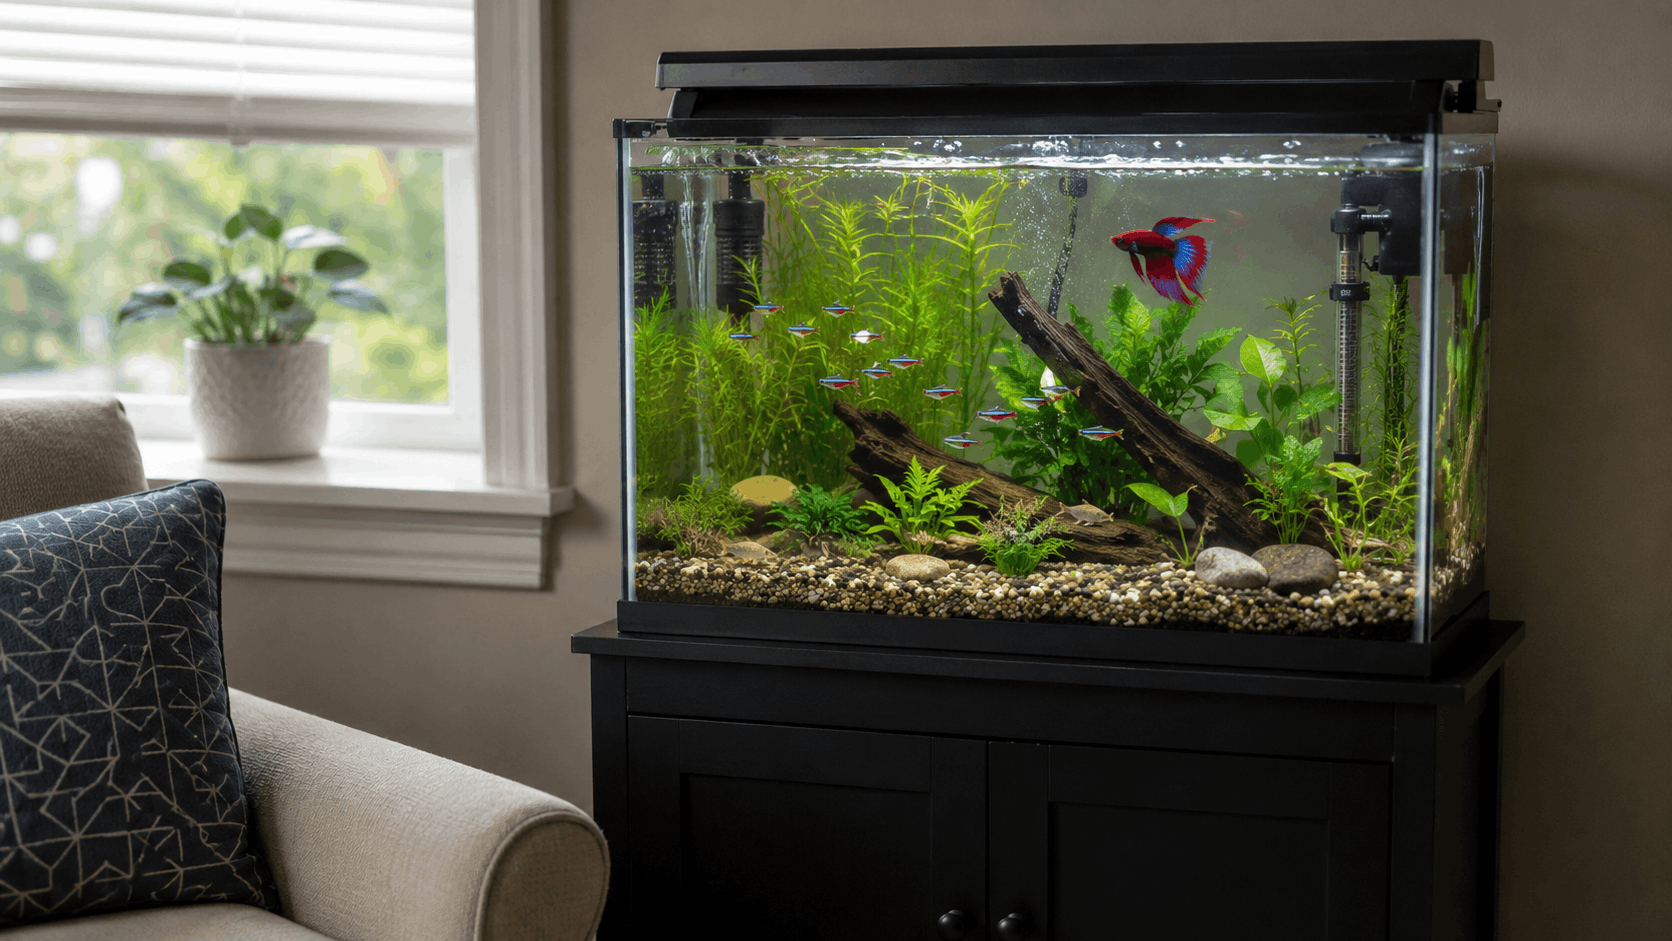
The Complete Beginner’s Guide to Setting Up Your First Pet Fish Tank
Introduction: Why Aquariums Are Easier to Set Up Than You Think
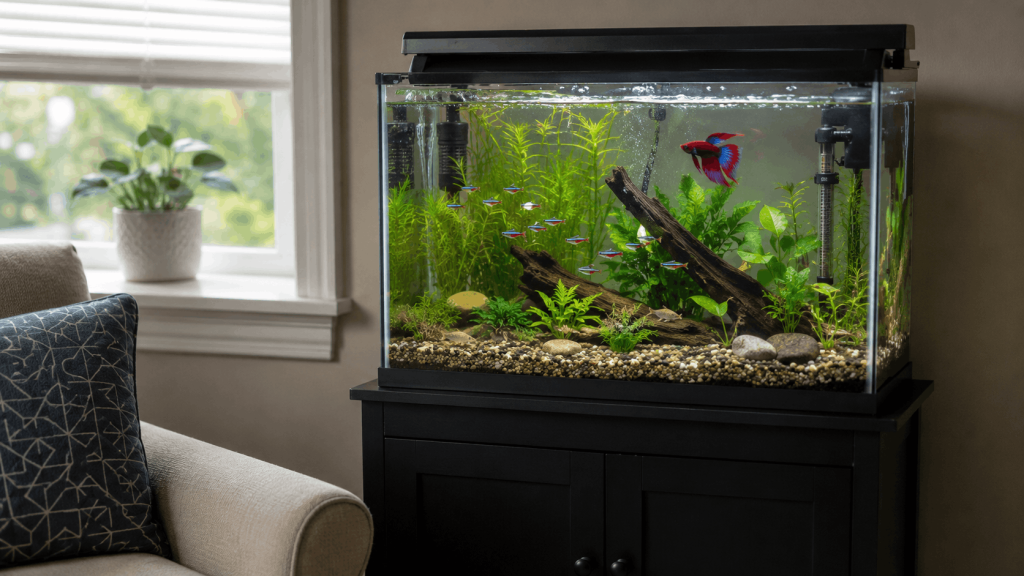
Setting up a pet fish tank sounds more complicated than it actually is. Most people think they need to be some kind of marine scientist to keep aquatic pets alive. The reality? You don’t.
Here’s what I’ve learned after years of watching both beginners and experienced aquarium keepers. Hobbyists: Success comes down to following one simple rule—patience. Not fancy equipment. Not expensive decorations. Just patience with the cycling process and consistency with maintenance.
The problem most new pet owners run into isn’t the setup itself. It’s rushing through the steps because they’re eager to add fish. I’ve seen this happen countless times. Someone buys a pet fish tank, fills it with water, adds fish the same day, and then loses them within a week to ammonia spikes. It’s heartbreaking and totally preventable.
This guide walks you through everything—from choosing the right tank size to understanding the nitrogen cycle to acclimating your first fish safely. By the end, you’ll know exactly what you’re doing and why each step matters.
Quick Answer Box
How long does it take to set up a pet fish tank? The actual setup takes 2-4 hours. But before you add fish, you need to cycle your tank (3-6 weeks for fishless cycling, or 4-8 weeks for fish-in cycling). This isn’t optional—it’s the single most important step that determines whether your fish will thrive or die.
Pre-Setup Planning: Questions to Ask Before You Start
Most beginners jump straight to the store and buy whatever looks good. Don’t do that. Five minutes of planning now saves frustration later.
What Type of Pet Fish Tank What Do You Actually Want?
This matters more than people realize. Different tank types have different requirements, and picking the wrong one is like choosing a home that’s wrong for your lifestyle.
Freshwater tanks are the obvious starting point. They’re forgiving and affordable, and you have tons of fish species to choose from. Hardy fish like bettas, goldfish, and tetras handle beginner mistakes better than most saltwater species.
Live plants are incorporated into planted aquariums to create a more natural habitat. They’re beautiful but require more attention to lighting, CO2, and fertilizers. They do help with water quality, which is a bonus, but they’re not beginner-easy.
Saltwater or reef tanks look stunning but demand precise water parameters and expensive equipment. Skip these if you’re just starting out. Seriously.
What Size Pet Fish Tank Should You Get?
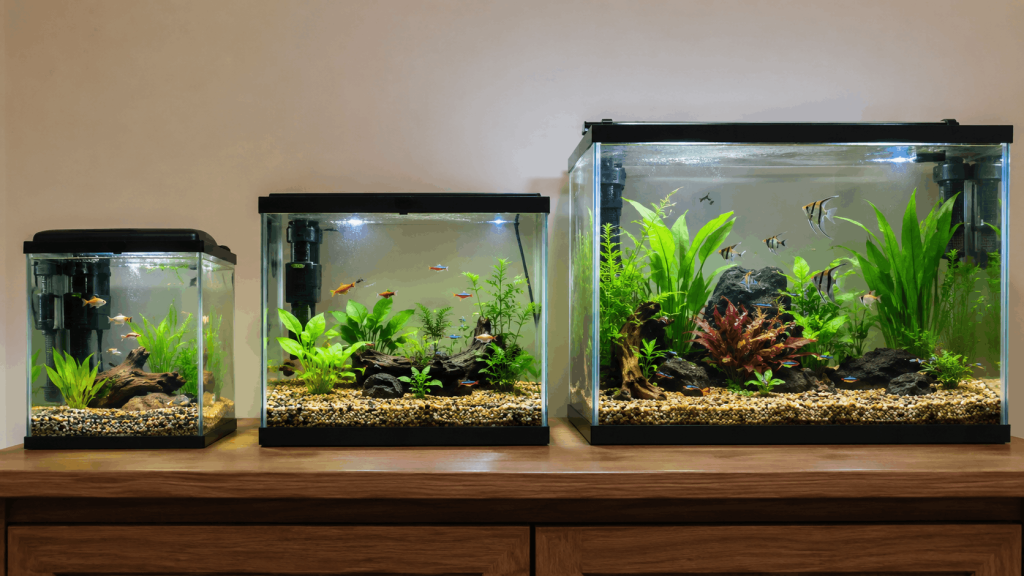
Here’s something that might surprise you: bigger tanks are actually easier to maintain than small ones. Counterintuitive, right?
When you have a smaller tank, everything changes rapidly. Temperature fluctuates. Waste builds up faster. A single uneaten pellet of fish food can trigger an ammonia spike that crashes your water quality in hours.
A larger tank (20 gallons or more) provides what aquarium hobbyists call “stability.” Changes happen more slowly. You have more margin for error.
The minimum I’d recommend for beginners is a 10-gallon fish tank. It’s not too expensive, holds enough water to be forgiving, and gives you space to keep compatible tank inhabitants without overcrowding.
Pro tip: Water weighs about 8.3 pounds per gallon. A 20-gallon tank full of water weighs around 166 pounds (plus the tank itself, substrate, and decorations). Make sure your stand or surface can handle the weight.
Where Will Your Tank Live?
Your tank’s location affects everything. Temperature, light exposure, and water quality all depend on where you place it.
Avoid direct sunlight. This encourages algae growth and causes temperature fluctuations that stress your aquatic pets. A room with indirect light is ideal.
Keep it away from air vents, fans, and heaters. These cause temperature swings that disrupt your fish’s stress levels and slow bacterial growth during cycling.
Place it near a power outlet but away from high-traffic areas. You’ll need to access it regularly for water changes, feeding, and testing.
How Much Will This Cost?
Budget matters. Let’s be realistic.
Economy setup (10 gallons): $75-150 for tank, basic filter, substrate, heater, light, and decorations. Then $20-30 monthly for food and occasional supplies.
Mid-range setup (20-30 gallons): $200-400 for equipment. Monthly costs run $30-50.
Premium setup (40+ gallons or planted): $500+ for equipment. Monthly maintenance costs $50-100+.
Don’t cheap out on the filter or test kit. These directly affect your fish’s survival. Everything else can wait.
Complete Equipment & Supplies Checklist for Your Pet Fish Tank
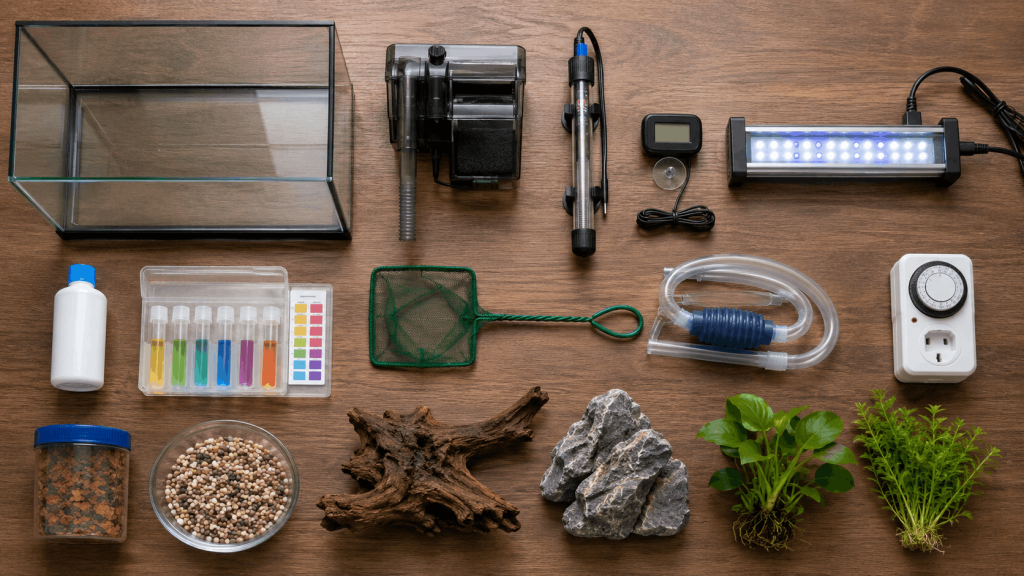
This is where most guides get vague. Let me be specific about what you actually need.
The Essentials (Non-Negotiable)
Aquarium tank. Glass or acrylic. Size depends on your fish species and how many tank inhabitants you want. Your choice.
Aquarium stand. Seriously, use one. Coffee tables and shelves fail. I’ve seen it happen.
Filter system. This is your nitrogen cycle’s home. The beneficial bacteria colonize your filter cartridges and filter media. Without a decent filter, nothing else matters. Hang-on-back filters work fine for beginners. Canister filters are overkill unless you have a large tank.
Substrate. Gravel or sand. Rinse it thoroughly with tap water before adding it to your tank—you’d be surprised how much dust comes with new substrate.
Aquarium heater and thermometer. Most tropical fish need water temperature around 75-78°F. A heater maintains this. A thermometer lets you verify it’s working.
Aquarium hood with light fixture. Provides the 12-hour light cycle your fish need. Your aquatic pets rely on this schedule to regulate their behavior and stress levels.
Water conditioner (dechlorinator). Tap water contains chlorine, which kills beneficial bacteria and damages fish gills. A water conditioner removes it instantly.
Critical But Overlooked Equipment
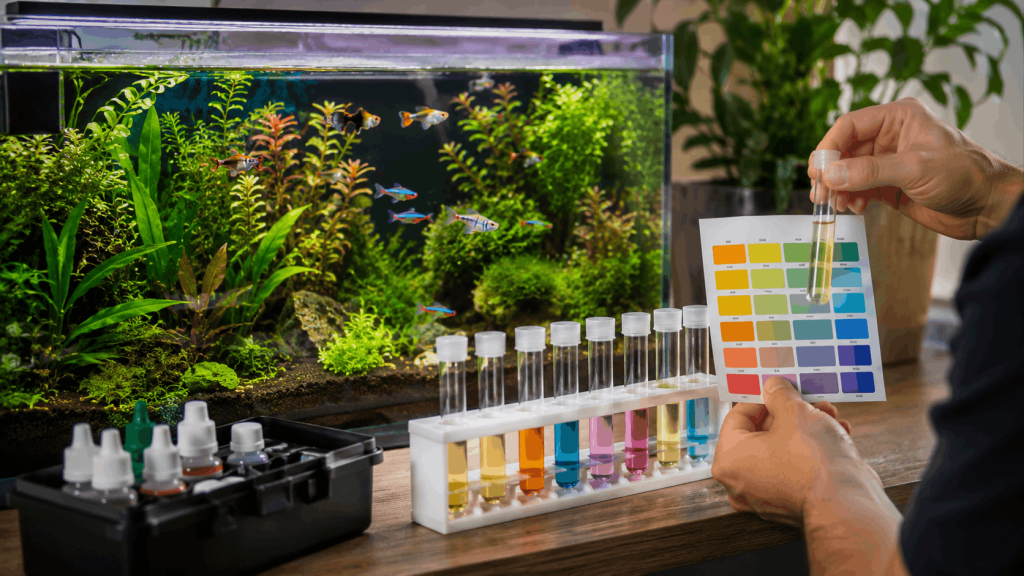
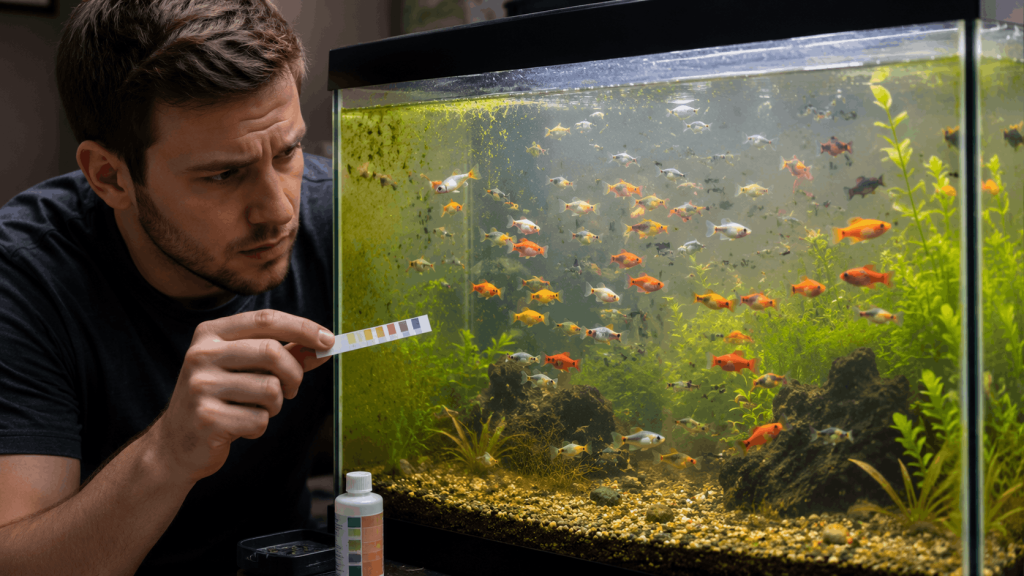
Water test kit (liquid, not strips). This is non-negotiable. Test strips are inaccurate garbage. Get an API Master Test Kit or a similar liquid test kit. You’ll test for ammonia, nitrite, nitrate, and pH. These water parameters tell you everything about your tank’s health.
Gravel vacuum. Makes water changes easier. Hand-siphon types work fine.
Aquarium net. For moving fish safely during acclimation or tank cleaning.
Algae cleaning pad. Keeps algae from coating your glass and blocking your view of your fish.
Beneficial bacteria starter (optional but helpful). Bacteria solutions like Tetra SafeStart speed up cycling. They’re worth the $15-20 investment.
For Aquascaping (The Fun Part)
Decorations. Driftwood, rocks, artificial ornaments—whatever your aquatic pets need to feel secure and explore. These aren’t just aesthetic. Fish behavior improves when they have places to hide and establish territory.
Live or artificial plants. Plants provide shelter, reduce stress, and help absorb waste. They’re not essential, but they’re worth it. If you go for live plants, start with easy species like Java fern or Anubias.
Step-by-Step Setup Guide: Your Aquarium Installation
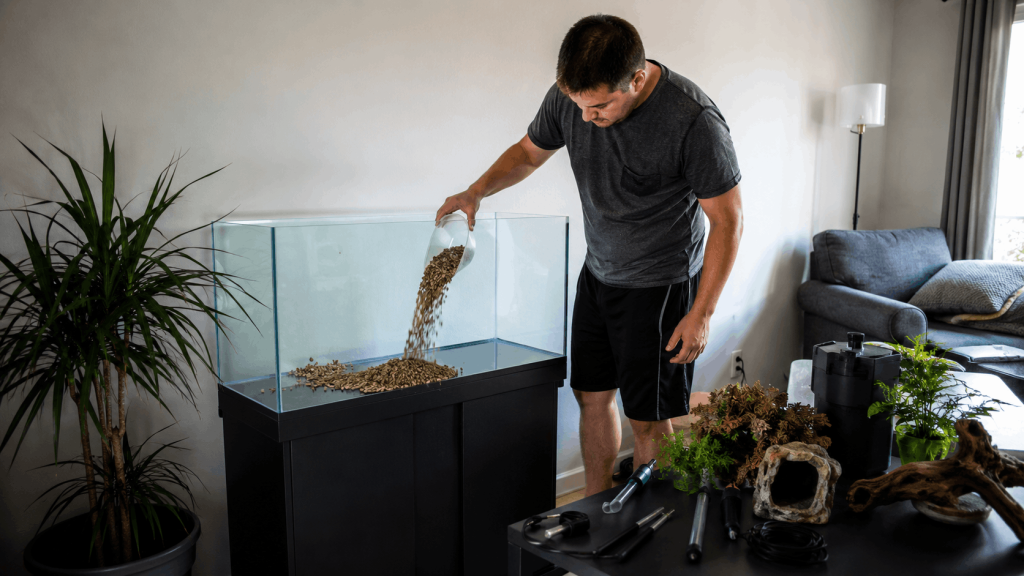
This is where most guides fall short. I’m going to give you the actual process, not just a checklist.
Step 1: Prepare Your Tank & Equipment
Take your tank out of the box. Inspect it for cracks or damage. Yes, really—I’ve seen people assemble damaged tanks and waste weeks cycling water before noticing leaks.
Thoroughly rinse the inside with tap water (no soap—soap residue is toxic). Wipe the glass dry.
Position your stand in its final location. Don’t move it after you fill it with water. The weight makes this dangerous and stressful for your aquatic pets if the tank shifts.
Don’t plug in your equipment yet. Just lay everything out and organize it nearby.
Step 2: Rinse & Layer Your Substrate
This step matters more than people think. Substrate dust clouds your water and blocks light.
Take your substrate (gravel or sand) and rinse it in a bucket with tap water. Stir it around. The water will turn brown or white with dust. Drain it. Repeat until the water runs clear. Yes, this takes patience. Yes, it’s worth it.
Pour your rinsed substrate into the tank. A depth of 2-3 inches is standard. Create a gentle slope from one side to the other. This looks more natural and helps waste accumulate in one area for easier cleaning.
Step 3: Install Your Filter System
If you’re using a hang-on-back filter:
- Insert the filter cartridges into their slots (or layers of media, depending on your filter type).
- Attach the intake tube to the filter intake guard.
- Add the sponge filter (if your filter has one) to the intake.
- Attach the water tube that will return filtered water to the tank.
- Position the outlet so water flows across the surface—this helps oxygenate the water.
Don’t turn it on yet. Just assemble it.
Step 4: Add Water & Install Heating/Lighting
Add a water conditioner to your tank (follow the dosage on the bottle—usually based on gallons).
Fill your tank with tap water. Fill it slowly so you don’t disturb your substrate. Use a plate or small bowl under the stream to break the water’s force.
Install your aquarium heater. Most people place it near the filter output so warm water circulates throughout the tank. Set it to 76°F (or whatever your specific fish species prefers).
Attach your thermometer to the glass to monitor temperature.
Install your aquarium hood and light fixture. Set up an automatic timer for a 12-hour light cycle (lights on at 8 AM, off at 8 PM works for most people).
Step 5: Add Aquascaping Elements
Secure your driftwood and rocks. Heavy pieces should rest on the substrate. Lighter ones can lean against them.
Plant your live plants (if using them). Bury the roots in substrate but leave the crown above the gravel. They’ll establish roots over the next week or two.
Stagger your plants around the tank. Vary their heights. This creates visual interest and gives your fish different levels to explore.
Pro move: position one or two plants to partially hide your filter. Your aquatic pets will feel more secure, and your tank will look better.
Step 6: Run Equipment & Check for Leaks
Plug in your heater, filter, and light. The heater will warm your water (takes 1-2 hours). The filter will start circulating water. The light will illuminate your setup.
Let everything run for 24 hours. Check that:
- Water temperature reaches and maintains your target (usually 76°F).
- Filter flow looks normal—water exits the return tube smoothly.
- No leaks appear around seals or connections.
- Water is still slightly cloudy (this is normal bacterial bloom).
If everything looks good after 24 hours, you’re ready to cycle.
Cycling Your Aquarium: The Most Critical Step
Here’s the reality: this is where most beginner fish die.
Your tank isn’t really “ready” for fish just because it’s filled with water and running equipment. You need the nitrogen cycle up and running. This is the process where beneficial bacteria colonize your filter media and substrate, establishing the foundation for healthy water quality.
Why the Nitrogen Cycle Matters
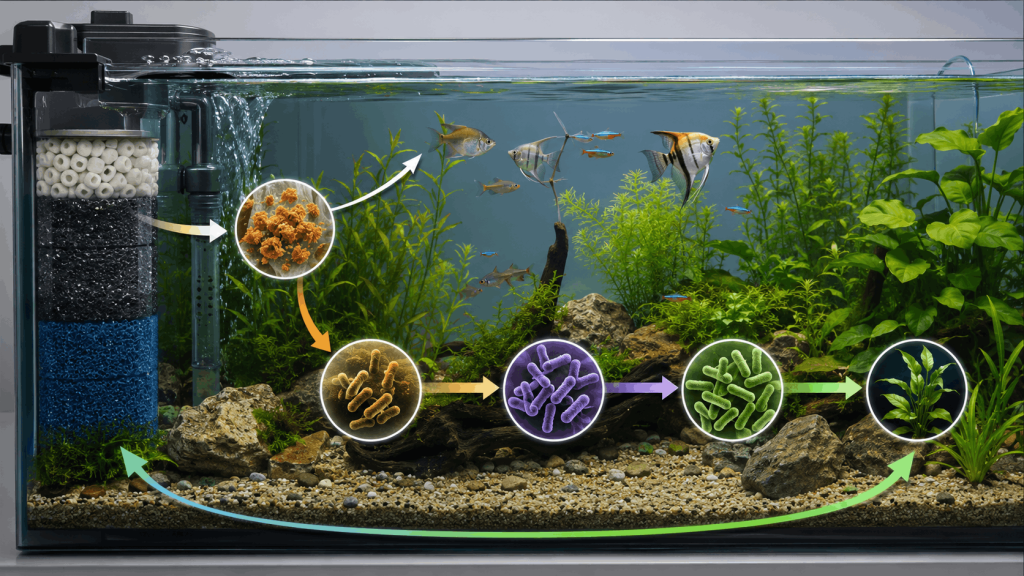
Fish produce waste as ammonia (through their gills and digestive system). Ammonia is extremely toxic to fish—it damages their gills and causes stress-related illness.
The nitrogen cycle works like this:
- Bacteria colonize your filter and substrate. These bacteria are Nitrosomonas species.
- They convert ammonia to nitrite. This takes a few days.
- Different bacteria convert nitrite to nitrate. Nitrobacter species handle this step.
- Nitrate is much less toxic. Your aquatic pets can tolerate it in moderate amounts (under 20 ppm).
Without this cycle running, ammonia and nitrite accumulate killing your fish. It’s not your fault if they die—it’s the nitrogen cycle not being established yet.
Fishless Cycling (The Humane Approach)
This is what I recommend for beginners.
You manually introduce ammonia without exposing live fish to toxic levels.
Here’s the actual process:
Days 1-7: Add ammonia to your tank (using ammonium chloride or liquid ammonia) to reach 1.5-2.0 ppm. You’ll see cloudiness as bacteria start colonizing. This is a normal bacterial bloom.
Days 7-14: Test your water daily. You’ll see ammonia drop and nitrite appear. Nitrite levels will spike (maybe to 2-5 ppm). This is the second stage of the cycle—don’t panic.
Days 14-21: Nitrite will gradually drop as nitrate rises. Once ammonia and nitrite both hit 0 ppm, and nitrate reaches 5+ ppm, your cycle is complete.
Reality check: Fishless cycling typically takes 3-6 weeks depending on temperature, filter media, and bacterial colonization speed. Cooler water cycles slower. Room temperature speeds things up.
Fish-In Cycling (Only If You Must)
Some people can’t wait. I get it. But this method is harder on your aquatic pets.
If you insist on this approach:
- Add only 2-3 hardy fish (like barbs or danios).
- Feed lightly—only what they eat in 1-2 minutes daily.
- Perform 25-30% water changes every 2-3 days to dilute ammonia and nitrite.
- Test water daily.
- Watch for signs of stress: fish gasping at the surface, clamped fins, sluggish behavior.
The cycle still takes 4-8 weeks. Your fish are stressed for most of that time. I don’t recommend it, but if you do it, be prepared for potential fish loss and commit to frequent water changes.
Speeding Up Your Cycle
If you have access to an established aquarium, take some of their filter media and add it to your new tank. This “seeds” your cycle with existing beneficial bacteria and cuts cycling time by 2-3 weeks.
Bacterial starter cultures (like Tetra SafeStart) can help, though they’re not miracle workers. They add bacteria, but they still need time and ammonia to colonize properly.
Testing Your Water During the Cycle
This is non-negotiable: get a liquid test kit.
Test for:
- Ammonia: Should start at 0 ppm, spike during the cycle, then drop back to 0 ppm.
- Nitrite: Appears around day 5-7, spikes, then drops to 0 ppm.
- Nitrate: Rises as nitrite drops. You want to see this.
- pH: Most fish prefer 6.5-8.3. Don’t obsess over this—it’ll stabilize on its own.
Your cycle is complete when:
- Ammonia reads 0 ppm
- Nitrite reads 0 ppm
- Nitrate is at least 5 ppm (and usually 20-40 ppm)
When Cycles Get Stuck (Troubleshooting)
Sometimes cycling doesn’t progress the way it should.
Ammonia won’t drop? Your tank might be too cold (bacteria work slower below 70°F). Increase water temperature to 75-78°F. Alternatively, you haven’t been seeded with enough bacteria yet. Give it more time or add a bacterial starter.
Nitrite stuck at high levels? Patience. A nitrite plateau is common. It can last 1-2 weeks. Keep testing daily and resist the urge to add fish.
Nothing’s happening? Make sure your filter is running 24/7. Bacteria need water flow. Also verify you’re actually adding ammonia or fish food (if doing fish-in cycling). Silent cycles get stuck because there’s no ammonia source.
Choosing & Adding Fish (After Cycling is Complete)
Only start this process once your ammonia and nitrite are 0 ppm and you’ve had nitrate present for at least 3-5 days.
Selecting Fish for Your New Pet Fish Tank
Not all fish are compatible with beginners or with each other.
Hardy species for beginners:
- Bettas (males must be alone)
- Goldfish (need bigger tanks than most people think—20+ gallons)
- Tetras (small, peaceful, school together)
- Corydoras catfish (bottom feeders, helpful for cleanup)
- Danios (active and forgiving)
Species compatibility matters. Some fish are aggressive and will kill peaceful species. Some need specific water conditions. Some grow much larger than you’d expect.
Take 15 minutes to research the specific species you want. Read about their adult size, temperament, and water parameter requirements. Don’t guess.
The Acclimation Process (This Matters)
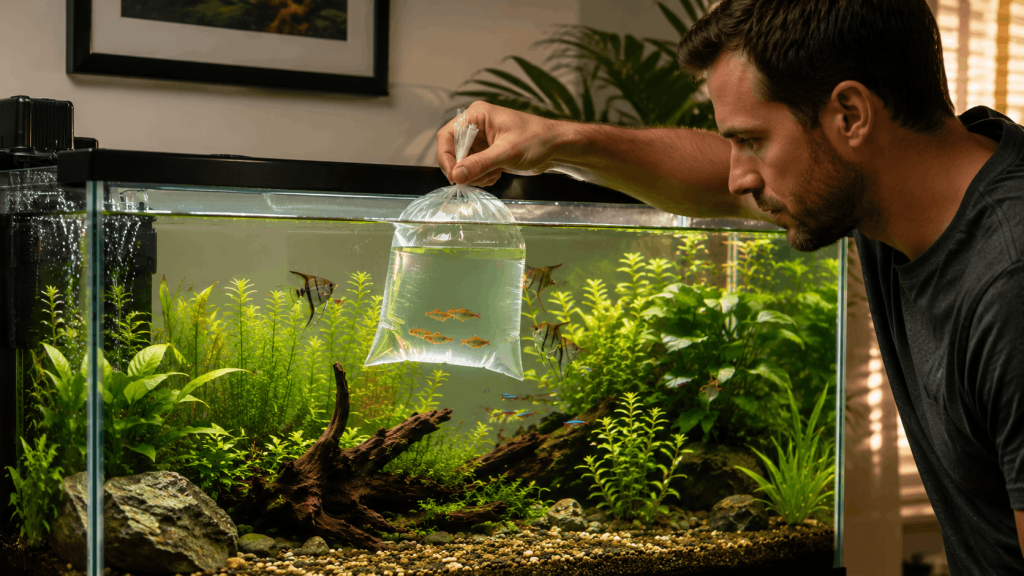
The first week is when new fish are most vulnerable, even if the aquarium has been cycled correctly.
When you bring a fish home, it’s in water with a different temperature, pH, and chemistry than your tank. Moving it directly to your tank causes osmotic shock—the fish’s body can’t adjust fast enough.
Here’s how to acclimate correctly:
- Turn off your aquarium lights. This reduces stress on the new fish.
- Float the sealed bag of fish in your tank for 15 minutes. This allows the water inside the bag to gradually match your tank’s temperature.
- Open the bag and gently scoop the fish with a net into your tank. Never add the bag’s water to your tank. Bag water often contains parasites or chemicals from the shipping process.
- Wait an hour before turning lights back on.
- Feed lightly or wait until the next day. Your fish needs time to adjust.
This 15-minute acclimation is the difference between a thriving fish and one that dies of stress within a week.
Setting up a tank?
No. This is where most beginners fail. Water that looks clear and equipment that runs doesn’t mean your tank is safe for fish. The nitrogen cycle takes weeks to establish. Add fish before your cycle is complete, and ammonia will spike and poison them. I’ve seen this happen dozens of times—it’s heartbreaking and preventable.
What’s the difference between fishless and fish-in cycling?
Fishless: You manually add ammonia (or fish food). Fish-free process. Takes 3-6 weeks. Your fish don’t suffer. When water changes are performed too infrequently, ammonia and nitrate can accumulate, creating poor water quality that increases the risk of stress, illness, and even fish deaths. Most tanks do fine with 25-50% water changes weekly. Adjust based on your test results, not arbitrary schedules.
Mistake #4: Ignoring the Cycle
Real scenario: Someone spends $300 on a beautiful pet fish tank setup. They fill it, add fish the same day, and lose them all within 3 days to ammonia poisoning. Two hundred dollars wasted because they couldn’t wait 3 weeks.
The cycle cannot be skipped. No amount of expensive equipment replaces biological maturation.
Mistake #5: Using Untreated Tap Water
Chlorine kills beneficial bacteria instantly. Always use water conditioner before adding any water to your tank—whether during setup, water changes, or emergency top-offs.
Mistake #6: Inconsistent Temperature
Fish are ectothermic (cold-blooded). Temperature affects their metabolism, immune function, and stress levels. Sudden temperature swings can crash a healthy fish quickly.
Keep your heater set consistently. Invest in a good thermometer so you can verify stability.
Mistake #7: Test Strips Instead of Liquid Test Kits
Test strips give you a rough idea. Liquid test kits give you accuracy.
When you’re making decisions about water changes or stocking, you need data you can trust. The API Master Test Kit costs $25-35 and will last you a year or more. It’s the best investment you can make in your pet fish tank’s success.
Aquarium Setup Variations (Beyond the Basic Tank)
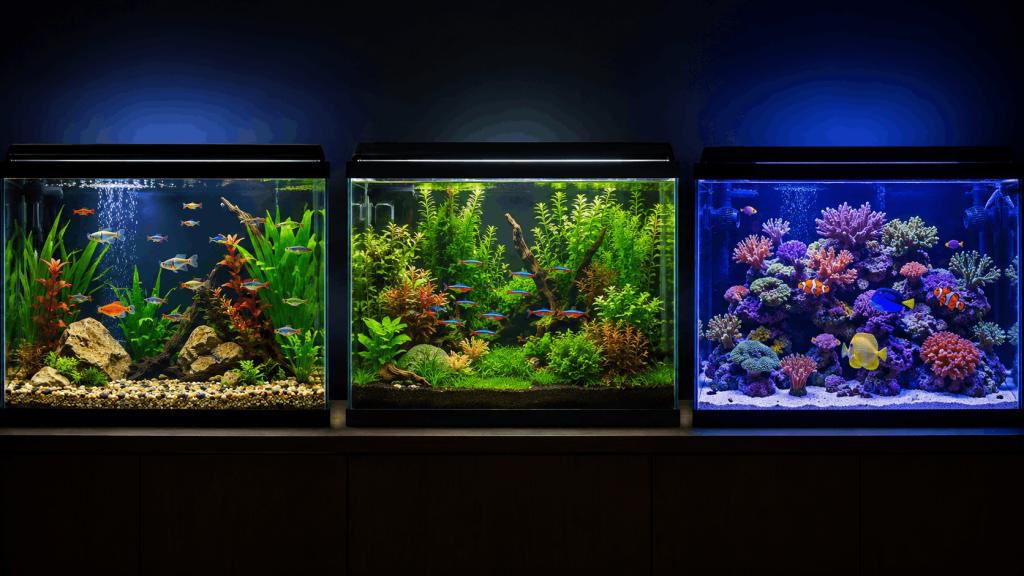
Once you’ve mastered a basic setup, you might want to explore other options.
Planted Tanks (The Beautiful Upgrade)
Live plants add oxygen, absorb nitrate, and look stunning. But they require more attention.
What’s different:
- Substrate needs to be nutrient-rich (aquarium soil works great).
- You need stronger lighting (6-8 hours daily).
- Fast-growing plants need fertilizers (liquid fertilizers work fine).
- Some plants need CO₂ injection (advanced, optional).
Best beginner plants:
- Java fern (low light, no substrate planting needed)
- Anubias (similar to java fern, very forgiving)
- Amazon sword (higher light, planted in substrate)
- Moss (attaches to rocks and driftwood)
Planted tanks have lower algae problems (plants outcompete algae for nutrients) and better water quality. They’re worth the extra effort if you care about aesthetics.
Nano Tanks (10 Gallons or Smaller)
Small tanks look cute but are harder to maintain. Water parameters swing rapidly. Temperature fluctuates fast. Bioload accumulates quickly.
If you want a nano setup, keep it to 5-10 gallons minimum and stock it lightly. Stick with small hardy fish: bettas, killifish, or small tetras. Accept that maintenance will be more frequent (water changes every 5-7 days).
Saltwater/Reef Tanks
Honestly? Skip this if you’re a beginner. Saltwater requires precise specific gravity, different beneficial bacteria, expensive equipment, and higher cost. Reef tanks demand even more precision. Start with freshwater. Graduate to saltwater in a few years if you want.
FAQ: Questions People Ask About Aquarium Setup
How long does it really take to set up a pet fish tank?
The physical setup takes 2-4 hours. But you can’t add fish for 3-6 weeks (fishless cycling) or 4-8 weeks (fish-in cycling). From purchasing your aquarium to safely introducing its full fish population, the entire process typically takes 4–8 weeks. I know that sounds long, but rushing this kills fish. Worth the wait.
Can you add fish immediately after
Fish-in: You add hardy fish to trigger the cycle. They’re exposed to toxic ammonia and nitrite for weeks. Stressful. Requires frequent water changes. Takes 4-8 weeks. Higher fish loss risk. Only do this if you absolutely cannot wait.
Do I really need a water test kit, or are test strips enough?
Liquid test kits (like API Master Test Kit) are far more accurate than strips. Strips can’t distinguish between important levels and often give false readings. For $25-35, a liquid kit is worth every penny. You’ll use it for years.
Why is my aquarium water cloudy after setup?
Typically bacterial bloom. Harmless bacteria are colonizing your filter and substrate, making the water slightly turbid. It clears within a few days. Occasionally it’s suspended substrate dust—if you didn’t rinse your gravel thoroughly, this causes cloudiness. In rare cases, it’s parasites or algae, but that’s less common in new tanks.
How often should I change my aquarium water?
Most established tanks do fine with 25-50% water changes weekly. The real answer: test your nitrate levels weekly. If nitrate stays under 20 ppm, your change frequency is adequate. If it climbs above 20 ppm, do larger or more frequent changes.
What’s the most important thing for beginner success?
Patience with cycling, consistent testing, and proper stocking. Pick one: most beginners fail because they skip the cycling phase. Pick two: they rush to stock. Pick three: they test infrequently and miss problems until it’s too late. Get these three right, and your fish will thrive.
Can I use decorations from outside or my yard?
Yes, with sterilization. Boil rocks and driftwood for 15-20 minutes to kill parasites and bacteria. Baked rocks (in your oven at 250°F for 30 minutes) work too. Never use treated wood, metal, or anything painted. Natural rock and untreated driftwood are fine once sterilized.
Comparison Table: Cycling Methods at a Glance
| Factor | Fishless Cycling | Fish-In Cycling |
| Fish Stress Level | None | High (first 4-8 weeks) |
| Duration | 3-6 weeks | 4-8 weeks |
| Fish Loss Risk | 0% | 20-50%+ |
| Water Change Frequency | 2-3 per week (during cycle) | Daily or every 2 days |
| Monitoring Required | Daily testing | Daily testing + observation |
| Equipment Cost | Slightly higher (ammonia source) | Same |
| Recommendation | Best for beginners | Only if no alternative |
Final Thoughts: Why This Matters
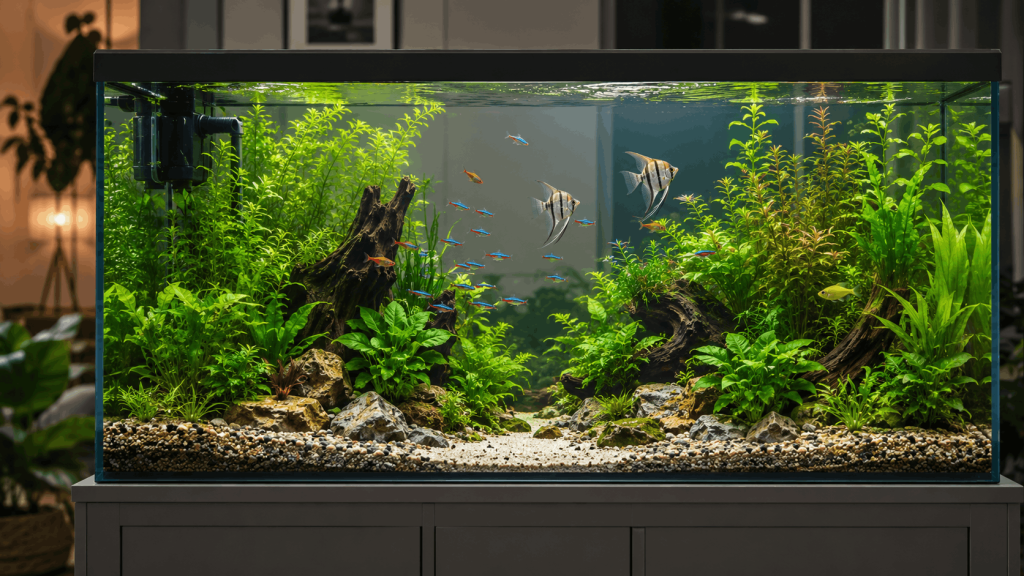
Here’s the thing most care guides won’t tell you: aquariums don’t fail because of bad equipment or expensive mistakes. They fail because of impatience.
You’re about to become responsible for living creatures. Fish don’t express gratitude or offer companionship like dogs or cats. They just… exist. Quietly, in their tank. But that existence depends entirely on your willingness to do things right—to cycle properly, to test water, to perform maintenance, and to resist adding fish too quickly.
Your pet fish tank will reward that patience. In 2-3 months, you’ll have a thriving ecosystem with healthy, active fish. You’ll know your parameters by heart. Maintenance will feel routine. You’ll wonder why you ever thought it was complicated.
Start with this guide. Do the work. Your fish will thank you—by being alive and thriving instead of stressed and sick.